


Cut costs and keep data secure with Google Workspace Archive
Significantly reduce what you spend on leavers licenses pending renewal with our Google Workspace archive tool. Use our smart automation features to meet your data retention requirements.
Request a call


Google AU license costs spiraling out of control?
Reduce costs by controlling your Google Workspace users with CloudM Archive
The retention of ex-employee data is a legal requirement in many jurisdictions. Since Google Archive User (AU) licenses are expensive, you should look for alternative Google Workspace archive solutions that ensure data remains accessible while keeping license spend low.
Key benefits of CloudM’s Google Workspace archive solution
Keep archived data safe in your own infrastructure
Reduce costs and avoid vendor lock-in by archiving your users’ Google Mail, Drive and Chatdata in your organization’s GCP storage bucket.
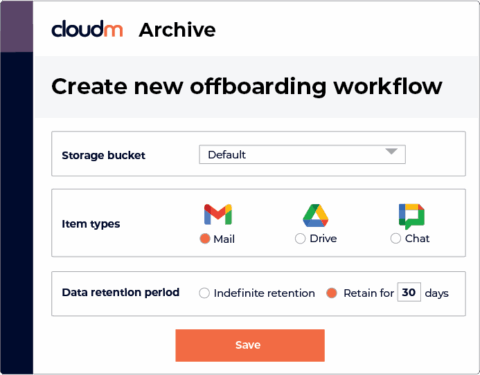
Reduce manual work with retention policies and license reassignment automation
Let your team focus on more important tasks while reducing the risk of mistakes by automating data retention policies and license reassignment using our data archiving solution as part of your offboarding workflow.
Automatically assign policies
Set up bespoke data retention policies and dynamic groups to ensure that the correct data is archived for each individual user and deleted when applicable, keeping you 100% compliant and your storage costs down.
Security at the core
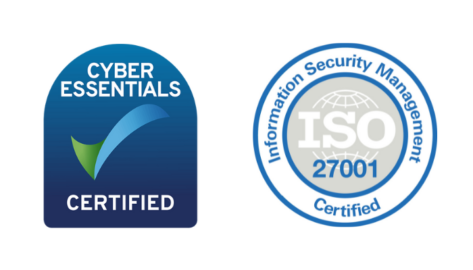
Your data security is our priority. We are ISO 27001 certified, and follow the latest NCSC Cloud Security Principles. We also apply full end-to-end encryption (AES 256) as well as secure coding practices and carry out in-depth pen tests.

Help whenever you need it
We offer global 24/7 online support with SLA’s for incident response times. Get expert product help from real people and benefit from our Smart Starts to kick your migration off in the right way. Live chat, screensharing and phone support are all available free of charge.
Interested in CloudM’s Archive capabilities? Request a demo with our team.
Frequently Asked Questions
What is the difference between CloudM Archive and CloudM Backup?
CloudM Archive is our dedicated solution for your ex-employees. With flexible retention policies, it is a cost-effective alternative to Google Archive User licenses that keeps you compliant with local data retention laws.
CloudM Backup keeps your active user data safe from accidental or malicious deletion, ensuring business continuity and compliance with data protection legislation.
Why should I archive leavers data?
It is important to archive leavers data because the retention of ex-employee data is a legal requirement in many jurisdictions.
Can I use Google Archive User licenses to store my data?
You can, but costs can quickly spiral. CloudM Archive is a cost-saving alternative to Google AU licenses.
Do I need a Google Workspace license alongside the CloudM Archive license?
No. When a user leaves your organization, you can set up your offboarding workflow to automatically remove the associated GWS license so it can be reassigned.
Once the user’s data is in CloudM Archive, it will then only occupy a CloudM Archive license until all data for this user is purged from the Google Cloud Storage bucket as part of your set retention policies.
What data can I archive with CloudM Archive?
You can archive your users Google Mail, Google Chat and Google Drive data apart from Google Sites, Google My Maps, Google Jamboard and Google Photos.
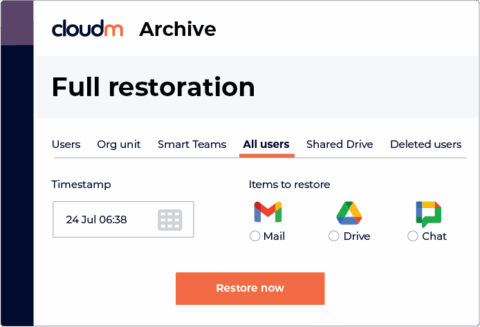
What restoration options do you offer?
You can restore individual Mail or Drive data or choose bulk restore of the whole user, all Drive or all Mail data.
What are the benefits of hosting archived data in my own infrastructure?
By storing your data in your GCP cloud storage, you can reduce costs and avoid vendor lock-in.
Is CloudM Archive secure?
Yes, we use encryption and follow strict data protection protocols to keep your information secure. We are ISO 27001 as well as Cyber Essentials certified and comply with regulations such as HIPAA while using secure coding practices. Find out more about our security accreditations here.
CloudM Modules
Latest resources
How Retail Businesses Use Google Workspace for Data Privacy Compliance
May 20, 2026
Find out more
5 reasons your M365 customers need a hot standby on Google Workspace
May 7, 2026
Find out more
A Guide to Large-Scale Data Migration for Google Workspace
April 30, 2026
Find out more-
How Retail Businesses Use Google Workspace for Data Privacy Compliance
May 20, 2026
-
5 reasons your M365 customers need a hot standby on Google Workspace
May 7, 2026
-